This is the third post in a series of writeups for Overthewire’s bandit challenges. Last time, we reviewed how we navigated from bandit10 through to bandit20. In doing so, we expanded upon Linux OS commandline tools we were introduced to earlier and also some new ones, such as nmap and SSL/TLS connections. While many of these topics may seem fairly rudimentary, they serve as a foundation for many Infosec and Information Technology (IT) professionals.
We continue our writeup by picking up where we left off:
Bandit Level 20 → Level 21
Level Goal
There is a setuid binary in the homedirectory that does the following: it makes a connection to localhost on the port you specify as a commandline argument. It then reads a line of text from the connection and compares it to the password in the previous level (bandit20). If the password is correct, it will transmit the password for the next level (bandit21).
NOTE: Try connecting to your own network daemon to see if it works as you think Commands you may need to solve this level
ssh, nc, cat, bash, screen, tmux, Unix ‘job control’ (bg, fg, jobs, &, CTRL-Z, …)
As with most of our previous challenges, we begin by taking stock of what the challenge provides us:
bandit20@bandit:~$ ls
suconnect
bandit20@bandit:~$ file suconnect
suconnect: setuid ELF 32-bit LSB executable, Intel 80386, version 1 (SYSV), dynamically linked, interpreter /lib/ld-linux.so.2, for GNU/Linux 2.6.32, BuildID[sha1]=74c0f6dc184e0412b6dc52e542782f43807268e1, not stripped
bandit20@bandit:~$ ./suconnect
Usage: ./suconnect <portnumber>
This program will connect to the given port on localhost using TCP. If it receives the correct password from the other side, the next password is transmitted back.
This challenge is meant to expand on our knowledge of how netcat operates. Recall in “Bandit Level 14 → Level 15” that we learned netcat (nc) can be used to establish network connections. Netcat can also be configured to listen on a port for connections and packets with the -l and -p flags, respectively.
bandit20@bandit:~$ nc -l -p 1337
We can see that nothing appears to happen; this is what we should expect, however. Netcat is currently in a ‘passive’ state, awaiting for a connection on port 1337. Let’s open another Commandline tab, re-login as bandit20, and attempt to call ./suconnect to our netcat listener:
bandit20@bandit:~$ ./suconnect 1337
Again, nothing appears to happen. But neither should we have expected anything to have happened. In reviewing the challenge, we can see that suconnect “…then reads a line of text from the connection and compares it to the password in the previous level (bandit20)”. So let’s pass it the password:
//From our netcat listener
GbKksEFF4yrVs6il55v6gwY5aVje5f0j
gE269g2h3mw3pwgrj0Ha9Uoqen1c9DGr

//From our suconnection
Read: GbKksEFF4yrVs6il55v6gwY5aVje5f0j
Password matches, sending next password
We’ve discovered the way to connect to the next level is:
ssh bandit21@bandit.labs.overthewire.org -p 2220
gE269g2h3mw3pwgrj0Ha9Uoqen1c9DGr
Bandit Level 21 → Level 22
Level Goal
A program is running automatically at regular intervals from cron, the time-based job scheduler. Look in /etc/cron.d/ for the configuration and see what command is being executed. Commands you may need to solve this level
cron, crontab, crontab(5) (use “man 5 crontab” to access this)
This task introduces us to several new commands and technologies. But first, let’s examine what resources we are provided:
bandit21@bandit:~$ cd /etc/cron.d
bandit21@bandit:/etc/cron.d$ ls
atop  cronjob_bandit22  cronjob_bandit23  cronjob_bandit24
bandit21@bandit:/etc/cron.d$ cat cronjob_bandit22
@reboot bandit22 /usr/bin/cronjob_bandit22.sh &> /dev/null
* * * * * bandit22 /usr/bin/cronjob_bandit22.sh &> /dev/null
What are we looking at? To begin, cron is a linux daemon used to execute scheduled commands or scripts. A crontab is a file that lists out the scheduled tasks (or ‘cron jobs’) that cron will exectute. A cron job is the scheduled task itself; cron jobs are useful for automated repetitive tasks. Cronjobs are formatted as:
 |----------- min (0-59)
 | |--------- hour (0-23)
 | | |------- day (1-31)
 | | | |----- month (1-12)
 | | | | |--- weekday (0-6) [Sun thru Sat]
 | | | | |
 x x x x x command-to-execute
Additionally the time/date fields may be replaced with particular extensions, beginning with the @ symbol (in our case, “@reboot” indicates to perform the cron job once after reboot). Jobs in /etc/cron.d/ are system jobs, which are used usally for more than one user; these jobs require a username, hence why we see “bandit22” appear in the cron jobs.
These cron jobs appear to invoke a shell script (/usr/bin/cronjob_bandit22.sh), and then redirect both stderr and stdout (&>) to the null device (/dev/null). The null device is a device file that discards all data written to it while reporting that the write operation was successful.
But what is being invoked? What is the shell script?
bandit21@bandit:/etc/cron.d$ cat /usr/bin/cronjob_bandit22.sh
#!/bin/bash
chmod 644 /tmp/t7O6lds9S0RqQh9aMcz6ShpAoZKF7fgv
cat /etc/bandit_pass/bandit22 > /tmp/t7O6lds9S0RqQh9aMcz6ShpAoZKF7fgv
This bash script first changes the permission of the file (/tmp/t7O6lds9S0RqQh9aMcz6ShpAoZKF7fgv) with chmod (see “Bandit Level 16 → Level 17”). It then opens the contents of /etc/bandit_pass/bandit22, which we can assume has the password for bandit22, and redirects it into /tmp/t7O6lds9S0RqQh9aMcz6ShpAoZKF7fgv. Let’s check that file out:
bandit21@bandit:/etc/cron.d$ cat /tmp/t7O6lds9S0RqQh9aMcz6ShpAoZKF7fgv
Yk7owGAcWjwMVRwrTesJEwB7WVOiILLI
We’ve discovered the way to connect to the next level is:
ssh bandit22@bandit.labs.overthewire.org -p 2220
Yk7owGAcWjwMVRwrTesJEwB7WVOiILLI
Bandit Level 22 → Level 23
Level Goal
A program is running automatically at regular intervals from cron, the time-based job scheduler. Look in /etc/cron.d/ for the configuration and see what command is being executed.
NOTE: Looking at shell scripts written by other people is a very useful skill. The script for this level is intentionally made easy to read. If you are having problems understanding what it does, try executing it to see the debug information it prints. Commands you may need to solve this level
cron, crontab, crontab(5) (use “man 5 crontab” to access this)
This challenge begins very similarly to the last, so let’s review the crontab for bandit23 in /etc/cron.d:
bandit22@bandit:~$ cd /etc/cron.d
bandit22@bandit:/etc/cron.d$ ls
atop  cronjob_bandit22  cronjob_bandit23  cronjob_bandit24
bandit22@bandit:/etc/cron.d$ cat cronjob_bandit23
@reboot bandit23 /usr/bin/cronjob_bandit23.sh  &> /dev/null
* * * * * bandit23 /usr/bin/cronjob_bandit23.sh  &> /dev/null
bandit22@bandit:/etc/cron.d$ cat /usr/bin/cronjob_bandit23.sh
#!/bin/bash

myname=$(whoami)
mytarget=$(echo I am user $myname | md5sum | cut -d ' ' -f 1)

echo "Copying passwordfile /etc/bandit_pass/$myname to /tmp/$mytarget"

cat /etc/bandit_pass/$myname > /tmp/$mytarget
What can we infer from this bash script? Let’s tease it apart:
First, the variable “myname” is instantiated and given the value returned by the command “whoami”. The whoami command displays the username of the current user when invoked. Since this is bandit23’s cronjob, we can infer that “myname” will be set to “bandit23”.
Next, the variable “mytarget” is instantiated and assigned the result of an echo command as piped through md5sum and cut. The md5sum command prints a 32-character checksum of a given input, using the MD5 algorithm. A checksum serves as a verification measure to assure the integrity of data; in this instance, however, it’s used more as a means to obfuscate our way forward, as we shall see momentarily.
The next line is simply an echo to the user to inform them of what will happen: the last line opens the bandit23 password file and writes it to a file named after the aforementioned checksum.
If we want to view the password, we will need to know the name of the file it is stored in: the modified checksum of “I am bandit23”.
We can discover it by repeating the echo command from line 2:
bandit22@bandit:/etc/cron.d$ echo I am user bandit23 | md5sum | cut -d ' ' -f 1
8ca319486bfbbc3663ea0fbe81326349
bandit22@bandit:/etc/bandit_pass$ cat /tmp/8ca319486bfbbc3663ea0fbe81326349
jc1udXuA1tiHqjIsL8yaapX5XIAI6i0n
We’ve discovered the way to connect to the next level is:
ssh bandit23@bandit.labs.overthewire.org -p 2220
jc1udXuA1tiHqjIsL8yaapX5XIAI6i0n
Bandit Level 23 → Level 24
Level Goal
A program is running automatically at regular intervals from cron, the time-based job scheduler. Look in /etc/cron.d/ for the configuration and see what command is being executed.
NOTE: This level requires you to create your own first shell-script. This is a very big step and you should be proud of yourself when you beat this level!
NOTE 2: Keep in mind that your shell script is removed once executed, so you may want to keep a copy around… Commands you may need to solve this level
cron, crontab, crontab(5) (use “man 5 crontab” to access this)
As before, we begin by examining the resources we are provided:
bandit23@bandit:~$ ls
bandit23@bandit:~$ cd /etc/cron.d
bandit23@bandit:/etc/cron.d$ ls
atop  cronjob_bandit22  cronjob_bandit23  cronjob_bandit24
bandit23@bandit:/etc/cron.d$ cat cronjob_bandit24
@reboot bandit24 /usr/bin/cronjob_bandit24.sh &> /dev/null
* * * * * bandit24 /usr/bin/cronjob_bandit24.sh &> /dev/null
bandit23@bandit:/etc/cron.d$ cat /usr/bin/cronjob_bandit24.sh
#!/bin/bash

myname=$(whoami)

cd /var/spool/$myname
echo "Executing and deleting all scripts in /var/spool/$myname:"
for i in * .*;
do
    if [ "$i" != "." -a "$i" != ".." ];
    then
        echo "Handling $i"
        timeout -s 9 60 ./$i
        rm -f ./$i
    fi
done
What does this bash script do? First is sets the variable “myname” to the user who invoked the script (which we can infer will be bandit24). Then it changes the working directory to /var/spool/$myname. Then, it begins going through every file and hidden file (for i in * .*;), with the exception of the special “.” and “..” files (if [ “$i” != “.” -a “$i” != “..” ];). The files the script finds it attempts to execute with the timeout command, letting it run at most for 60 seconds (timeout -s 9 60 ./$i). Finally, it deletes the file (rm -f ./$i) and closes the script.
So, now that we know what this script does (invoking scripts located in /var/spool/bandit24) and that it is runs on a recurring basis (from the challenge description), we can write and plant a script in /var/spool/bandit24 and have it run. We know (from other challenges) that the password is located in like-named file within /tmp/bandit_pass; let’s write a script for the bash script to open and copy its contents:
bandit23@bandit:~$ mkdir /tmp/ahessmat_bandit23
bandit23@bandit:~$ cd /tmp/ahessmat_bandit23
bandit23@bandit:~$ nano get_pass

#!/bin/bash

cat /etc/bandit_pass/bandit24 > /tmp/ahessmat_bandit23/password24
To make this an executable, we will need to modify the permissions on this file with the chmod command. Since we are not going to be the ones accessing the script (bandit24 is), we’ll want to let anyone (a) execute (x) it. Likewise, since we have the script writing a copy of the password to our newly created directory (/tmp/ahessmat_bandit23) that is not owned by bandit24, we will need to modify the directory’s permissions as well:
bandit23@bandit:/tmp/ahessmat_bandit23$ chmod a+x get_pass
bandit23@bandit:/tmp/ahessmat_bandit23$ chmod a+w .
We can then copy our script into /var/spool/bandit24 and wait:
bandit23@bandit:/tmp/ahessmat_bandit23$ cp get_pass /var/spool/bandit24
bandit23@bandit:/tmp/ahessmat_bandit23$ ls
get_pass
bandit23@bandit:/tmp/ahessmat_bandit23$ ls
get_pass
bandit23@bandit:/tmp/ahessmat_bandit23$ ls
get_pass  password24
bandit23@bandit:/tmp/ahessmat_bandit23$ cat password24
UoMYTrfrBFHyQXmg6gzctqAwOmw1IohZ
We’ve discovered the way to connect to the next level is:
ssh bandit24@bandit.labs.overthewire.org -p 2220
UoMYTrfrBFHyQXmg6gzctqAwOmw1IohZ
Bandit Level 24 → Level 25
Level Goal
A daemon is listening on port 30002 and will give you the password for bandit25 if given the password for bandit24 and a secret numeric 4-digit pincode. There is no way to retrieve the pincode except by going through all of the 10000 combinations, called brute-forcing.
If we start with a basic netcat connection to localhost on port 30002, we note that nothing appears to happen (nor should we expect it to, but for posterity’s sake, it’s worth checking):
bandit24@bandit:~$ nc localhost 30002
bandit24@bandit:~$
Per the description of the challenge, the daemon is passively listening for a message. A daemon is a program which performs periodic tasks in such a manner that it is normally unnoticed by users. Some daemons, like this one, run constantly - waiting for a significant event.
Let’s try to connect again, but this time pushing it what it would expect (that is to say, the password to level 24 along with a 4-digit pin number):
bandit24@bandit:~$ echo UoMYTrfrBFHyQXmg6gzctqAwOmw1IohZ 0000 | nc localhost 30002
I am the pincode checker for user bandit25. Please enter the password for user bandit24 and the secret pincode on a single line, separated by a space.
Wrong! Please enter the correct pincode. Try again.
Timeout. Exiting.
This is more telling and useful. First, we get a response that affirms we are on the right track. Then, we also see by the “Try again” message that the daemon expects us to repeatedly give guesses (consistent with the challenge’s message that we need to brute force all the possible pins). We therefore must make a script (as we did in “Bandit Level 23 → Level 24”) to automate these guess attempts. There are a few ways to write this solution, so let’s compare a few:
#!/bin/bash

for i in {0000..9999}
do
  echo "Trying UoMYTrfrBFHyQXmg6gzctqAwOmw1IohZ $i on  port $i"
  echo "UoMYTrfrBFHyQXmg6gzctqAwOmw1IohZ $i" | nc localhost 30002
  sleep 0.1
done
This solution may eventually work, but it is imperfect. How so? This script requires us to make a connection with the daemon with only 1 password + pin combination, wait until the we receive the timeout message, then increment the pin and try again. Iterating over every single one of these inputs this way is slow.
Instead, we’ll try a faster option, whereby we make a single connection attempt and then push every combination through. Again, there are several ways to go about this. Let’s first begin by building a list with every possible password + pin combination. Rather than compose such a list by manually, we’ll automate this with a script:
#!/bin/bash

for i in {0000..9999}
  do
    echo UoMYTrfrBFHyQXmg6gzctqAwOmw1IohZ $i >> passpinlist
  done
Note: I’ve ommitted in this explanation the need to create a working directory where this file should be stored (see “Bandit Level 12 → Level 13”) and permit the script to be executable (see “Bandit Level 23 → Level 24”); you should refer to earlier writeups for a description on how to do this. For this writeup, I’ve saved the above script as “passpin”. When the script runs, it will generate a file named “passpinlist” containing every combination of pin numbers.
We can then read in each possible combination to the connection as such:
./passpin
cat passpin | nc localhost 30002
Wrong! Please enter the correct pincode. Try again.
Wrong! Please enter the correct pincode. Try again.
...
Wrong! Please enter the correct pincode. Try again.
Correct!
The password of user bandit25 is uNG9O58gUE7snukf3bvZ0rxhtnjzSGzG

Exiting.
We’ve discovered the way to connect to the next level is:
ssh bandit25@bandit.labs.overthewire.org -p 2220
uNG9O58gUE7snukf3bvZ0rxhtnjzSGzG
Bandit Level 25 → Level 26
Level Goal
Logging in to bandit26 from bandit25 should be fairly easy… The shell for user bandit26 is not /bin/bash, but something else. Find out what it is, how it works and how to break out of it. Commands you may need to solve this level
ssh, cat, more, vi, ls, id, pwd
This is a very creative challenge that really requires understanding and diving into the manual pages of the suggested commands.
We begin this challenge by examining provided materials:
bandit25@bandit:~$ ls
bandit26.sshkey
bandit25@bandit:~$ cat bandit26.sshkey
-----BEGIN RSA PRIVATE KEY-----
MIIEpQIBAAKCAQEApis2AuoooEqeYWamtwX2k5z9uU1Afl2F8VyXQqbv/LTrIwdW
pTfaeRHXzr0Y0a5Oe3GB/+W2+PReif+bPZlzTY1XFwpk+DiHk1kmL0moEW8HJuT9
/5XbnpjSzn0eEAfFax2OcopjrzVqdBJQerkj0puv3UXY07AskgkyD5XepwGAlJOG
xZsMq1oZqQ0W29aBtfykuGie2bxroRjuAPrYM4o3MMmtlNE5fC4G9Ihq0eq73MDi
1ze6d2jIGce873qxn308BA2qhRPJNEbnPev5gI+5tU+UxebW8KLbk0EhoXB953Ix
3lgOIrT9Y6skRjsMSFmC6WN/O7ovu8QzGqxdywIDAQABAoIBAAaXoETtVT9GtpHW
qLaKHgYtLEO1tOFOhInWyolyZgL4inuRRva3CIvVEWK6TcnDyIlNL4MfcerehwGi
il4fQFvLR7E6UFcopvhJiSJHIcvPQ9FfNFR3dYcNOQ/IFvE73bEqMwSISPwiel6w
e1DjF3C7jHaS1s9PJfWFN982aublL/yLbJP+ou3ifdljS7QzjWZA8NRiMwmBGPIh
Yq8weR3jIVQl3ndEYxO7Cr/wXXebZwlP6CPZb67rBy0jg+366mxQbDZIwZYEaUME
zY5izFclr/kKj4s7NTRkC76Yx+rTNP5+BX+JT+rgz5aoQq8ghMw43NYwxjXym/MX
c8X8g0ECgYEA1crBUAR1gSkM+5mGjjoFLJKrFP+IhUHFh25qGI4Dcxxh1f3M53le
wF1rkp5SJnHRFm9IW3gM1JoF0PQxI5aXHRGHphwPeKnsQ/xQBRWCeYpqTme9amJV
tD3aDHkpIhYxkNxqol5gDCAt6tdFSxqPaNfdfsfaAOXiKGrQESUjIBcCgYEAxvmI
2ROJsBXaiM4Iyg9hUpjZIn8TW2UlH76pojFG6/KBd1NcnW3fu0ZUU790wAu7QbbU
i7pieeqCqSYcZsmkhnOvbdx54A6NNCR2btc+si6pDOe1jdsGdXISDRHFb9QxjZCj
6xzWMNvb5n1yUb9w9nfN1PZzATfUsOV+Fy8CbG0CgYEAifkTLwfhqZyLk2huTSWm
pzB0ltWfDpj22MNqVzR3h3d+sHLeJVjPzIe9396rF8KGdNsWsGlWpnJMZKDjgZsz
JQBmMc6UMYRARVP1dIKANN4eY0FSHfEebHcqXLho0mXOUTXe37DWfZza5V9Oify3
JquBd8uUptW1Ue41H4t/ErsCgYEArc5FYtF1QXIlfcDz3oUGz16itUZpgzlb71nd
1cbTm8EupCwWR5I1j+IEQU+JTUQyI1nwWcnKwZI+5kBbKNJUu/mLsRyY/UXYxEZh
ibrNklm94373kV1US/0DlZUDcQba7jz9Yp/C3dT/RlwoIw5mP3UxQCizFspNKOSe
euPeaxUCgYEAntklXwBbokgdDup/u/3ms5Lb/bm22zDOCg2HrlWQCqKEkWkAO6R5
/Wwyqhp/wTl8VXjxWo+W+DmewGdPHGQQ5fFdqgpuQpGUq24YZS8m66v5ANBwd76t
IZdtF5HXs2S5CADTwniUS5mX1HO9l5gUkk+h0cH5JnPtsMCnAUM+BRY=
-----END RSA PRIVATE KEY-----
It appears that we are provided an RSA private key, similar to previous levels (see: “Bandit Level 13 → Level 14” and “Bandit Level 16 → Level 17”). If we try to log into it however, we find we are immediately kicked out of the session, after a banner spelling “bandit26” is printed:
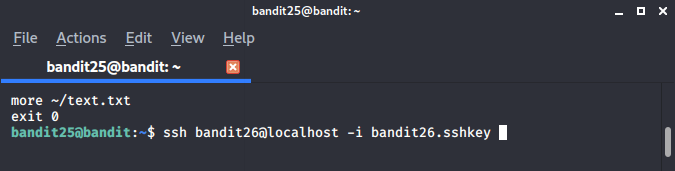
bandit25@bandit:~$ ssh -i bandit26.sshkey bandit26@localhost
...
  Enjoy your stay!

  _                     _ _ _   ___   __
 | |                   | (_) | |__ \ / /
 | |__   __ _ _ __   __| |_| |_   ) / /_
 | '_ \ / _` | '_ \ / _` | | __| / / '_ \
 | |_) | (_| | | | | (_| | | |_ / /| (_) |
 |_.__/ \__,_|_| |_|\__,_|_|\__|____\___/
Connection to localhost closed.
bandit25@bandit:~$
If we reference the challenge’s clue, we are informed that the shell for accessing bandit26 isn’t in /bin/bash. So where is it?
In linux environments, the /etc/passwd file stores essential information of each user/account on the machine. Permissions for /etc/passwd are by default set so that it is world readable (it can be read by any user on the system). Each line in /etc/passwd represents a single user. The first listed is the root account, followed by system-defined groups and accounts, then others who use the system. Each line contains seven attributes/fields, separated by colons (if there is no data for an attribute, there are just consecutive colons). For example:
name:password:userID:groupID:gecos:homeDirectory:shell
- name: used when the user logs in.
- password: the password associated with logging in. An “x” character indicates that the encrypted password is stored in the /etc/shadow file.
- userID (UID): each user must be assigned a user ID. UID 0 (zero) is reserved for root; UIDs 1-99 are reserved for other predefined accounts. Further UID 100-999 are reserved by system for administrative and system accounts/groups.
- groupID (GID): The primary group ID (stored in /etc/group file).
- gecos: The comment field for adding extra information.
- homeDirectory: The absolute path to the directory the user will be in when the log in.
- shell: The absolute path of a shell (typically /bin/bash).
So let’s try opening the /etc/passwd file and see what appears for user bandit26.
bandit25@bandit:~$ cat /etc/passwd | grep bandit26
bandit26:x:11026:11026:bandit level 26:/home/bandit26:/usr/bin/showtext
From this, we can see that the shell field is not /bin/bash, but is instead /usr/bin/showtext. Let’s see what is in there:
bandit25@bandit:~$ cat /usr/bin/showtext
#!/bin/sh
export TERM=linux
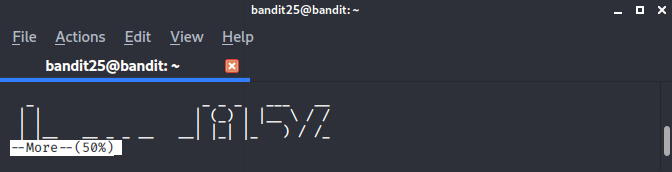
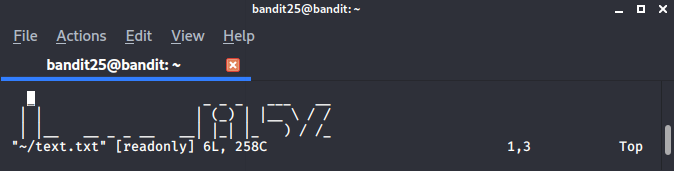
more ~/text.txt
exit 0
We can see from the top of the line that this is a bash script. The first line “export TERM=linux” defines the bash shell that’s created to be a linux environment. The next line “more ~/text.txt” reads out the file text.txt piece-by-piece; the more command is a filter for paging through text one “screenful” at a time. Finally, the “exit 0” line successfully exits the shell (note: running to the end of of a bash script file also exits). Based off of how the login performed at the start, we may assume that the file text.txt contains the following banner:
  _                     _ _ _   ___   __
 | |                   | (_) | |__ \ / /
 | |__   __ _ _ __   __| |_| |_   ) / /_
 | '_ \ / _` | '_ \ / _` | | __| / / '_ \
 | |_) | (_| | | | | (_| | | |_ / /| (_) |
 |_.__/ \__,_|_| |_|\__,_|_|\__|____\___/
So how can this be exploited?
Based off of the script, the shell will exit after “more ~/text.txt” has been completely paged through. In order to avoid hitting the “exit 0” line in the script, we need shrink our terminal’s size to be less tall than the banner above, then attempting to log back in with the provided ssh key:
Note: we could have also just edited the /usr/bin/showtext file, except that we do not have the permissions to edit this file.
Now what? If we let the more command run through, the shell will exit. But, fortunately, the more command has some functionality baked into it. If we hit the “v” key, we open vim - a text editor within unix machines.
Now vim has a number of capabilities to it. It also has an interesting vulnerability about it, as documented by this post on the SANS website.
We can enter the vim console by pressing the “esc” key. After that, we can set the restricted shell to /usr/bin by entering:
:set shell=/bin/bash
Then we can execute the shell by evoking the next vim command:
:shell
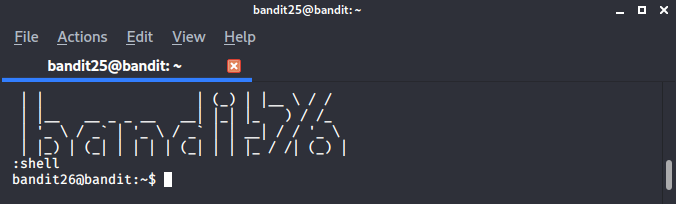
Success! We are in the bandit26 level. Now, to make it easier to access this level in the future, we can navigate to the directory where all passwords are stored: /etc/bandit_pass.
bandit26@bandit:~$ cat /etc/bandit_pass/bandit26
5czgV9L3Xx8JPOyRbXh6lQbmIOWvPT6Z
We’ve discovered the way to connect to the next level is:
ssh bandit26@bandit.labs.overthewire.org -p 2220
5czgV9L3Xx8JPOyRbXh6lQbmIOWvPT6Z
Bandit Level 26 → Level 27
Level Goal
Good job getting a shell! Now hurry and grab the password for bandit27! Commands you may need to solve this level
ls
This one invokes some similar skills we developed back in the “Bandit Level 19 → Level 20” challenge. Like those before, we begin by seeing what we are given:
bandit26@bandit:~$ ls bandit27-do text.txt
There are 2 files given to us. The “text.txt” file contains the banner that we identified in the previous challenge, “Bandit Level 25 → Level 26”. The other file, bandit27-do is an executable (which you can verify for yourself by running the “file” command on it). Let’s test it to see what it does:
bandit26@bandit:~$ ./bandit27-do
Run a command as another user.
  Example: ./bandit27-do id
If we can invoke commands with bandit27 permissions, then we can open the password for bandit27 at the /etc/bandit_pass directory:
bandit26@bandit:~$ ./bandit27-do cat /etc/bandit_pass/bandit27
3ba3118a22e93127a4ed485be72ef5ea
We’ve discovered the way to connect to the next level is:
ssh bandit27@bandit.labs.overthewire.org -p 2220
3ba3118a22e93127a4ed485be72ef5ea
Bandit Level 27 → Level 28
Level Goal
There is a git repository at ssh://bandit27-git@localhost/home/bandit27-git/repo. The password for the user bandit27-git is the same as for the user bandit27.
Clone the repository and find the password for the next level. Commands you may need to solve this level
git
This challenge introduces us to the git domain. Git is a free and open source distributed version control system (VCS). One popular implementation of git that you may have heard of is the source code manager, Github. Git controls projects by managing and merging various repositories (both local and remote).
The challenge identifies where a repository exists, so we need to clone it (aka copy from a remote location to our local one).
Just as we’ve done in “Bandit Level 12 → Level 13” and other challenges, we first need to create a temporary directory to clone the repository (or “repo”) to, then change our working directory to the newly created one:
bandit27@bandit:~$ mkdir /tmp/ahessmat_bandit27
bandit27@bandit:~$ cd /tmp/ahessmat_bandit27
We can then invoke the git command and clone the repository (without additional commands, the command below clones the repo to our present working directory). When prompted, we can provide the bandit27 password:
bandit27@bandit:/tmp/ahessmat_bandit27$ git clone ssh://bandit27-git@localhost/home/bandit27-git/repo
Cloning into 'repo'...
Could not create directory '/home/bandit27/.ssh'.
The authenticity of host 'localhost (127.0.0.1)' can't be established.
ECDSA key fingerprint is SHA256:98UL0ZWr85496EtCRkKlo20X3OPnyPSB5tB5RPbhczc.
Are you sure you want to continue connecting (yes/no)? yes
Failed to add the host to the list of known hosts (/home/bandit27/.ssh/known_hosts).
This is a OverTheWire game server. More information on http://www.overthewire.org/wargames

bandit27-git@localhost's password:
remote: Counting objects: 3, done.
remote: Compressing objects: 100% (2/2), done.
remote: Total 3 (delta 0), reused 0 (delta 0)
Receiving objects: 100% (3/3), done.
With the repo cloned, we can check it out and see what we’ve got:
bandit27@bandit:/tmp/ahessmat_bandit27$ ls
repo
bandit27@bandit:/tmp/ahessmat_bandit27$ cd repo/
bandit27@bandit:/tmp/ahessmat_bandit27/repo$ ls
README
bandit27@bandit:/tmp/ahessmat_bandit27/repo$ cat README
The password to the next level is: 0ef186ac70e04ea33b4c1853d2526fa2
We’ve discovered the way to connect to the next level is:
ssh bandit28@bandit.labs.overthewire.org -p 2220
0ef186ac70e04ea33b4c1853d2526fa2
Bandit Level 28 → Level 29
Level Goal
There is a git repository at ssh://bandit28-git@localhost/home/bandit28-git/repo. The password for the user bandit28-git is the same as for the user bandit28.
Clone the repository and find the password for the next level. Commands you may need to solve this level
git
This challenge builds upon our skills we developed in “Bandit Level 27 → Level 28”. One of the things git does as a version control system is track changes they are implemented to repositories. Users can then review and compare differences in these changes over the repo’s history.
Let’s begin this challenge the same way we did in “Bandit Level 27 → Level 28” by creating a temporary working directory, cloning the repo, and examining what’s given:
bandit28@bandit:~$ mkdir /tmp/ahessmat_bandit28
bandit28@bandit:~$ cd /tmp/ahessmat_bandit28
bandit28@bandit:/tmp/ahessmat_bandit28$ ls
bandit28@bandit:/tmp/ahessmat_bandit28$ git clone ssh://bandit28-git@localhost/home/bandit28-git/repo
Cloning into 'repo'...
Could not create directory '/home/bandit28/.ssh'.
The authenticity of host 'localhost (127.0.0.1)' can't be established.
ECDSA key fingerprint is SHA256:98UL0ZWr85496EtCRkKlo20X3OPnyPSB5tB5RPbhczc.
Are you sure you want to continue connecting (yes/no)? yes
Failed to add the host to the list of known hosts (/home/bandit28/.ssh/known_hosts).
This is a OverTheWire game server. More information on http://www.overthewire.org/wargames

bandit28-git@localhost's password:
remote: Counting objects: 9, done.
remote: Compressing objects: 100% (6/6), done.
remote: Total 9 (delta 2), reused 0 (delta 0)
Receiving objects: 100% (9/9), done.
Resolving deltas: 100% (2/2), done.
bandit28@bandit:/tmp/ahessmat_bandit28$ cd repo/
bandit28@bandit:/tmp/ahessmat_bandit28/repo$ ls
README.md
bandit28@bandit:/tmp/ahessmat_bandit28/repo$ cat README.md
# Bandit Notes
Some notes for level29 of bandit.

## credentials

- username: bandit29
- password: xxxxxxxxxx
Unfortunately, the file that’s given doesn’t contain the password to the next level. But perhaps a previous version (aka “commit”) does. Inside the /repo directory, let’s check the git log:
bandit28@bandit:/tmp/ahessmat_bandit28/repo$ git log
commit 073c27c130e6ee407e12faad1dd3848a110c4f95
Author: Morla Porla <morla@overthewire.org>
Date:   Tue Oct 16 14:00:39 2018 +0200

    fix info leak

commit 186a1038cc54d1358d42d468cdc8e3cc28a93fcb
Author: Morla Porla <morla@overthewire.org>
Date:   Tue Oct 16 14:00:39 2018 +0200

    add missing data

commit b67405defc6ef44210c53345fc953e6a21338cc7
Author: Ben Dover <noone@overthewire.org>
Date:   Tue Oct 16 14:00:39 2018 +0200

    initial commit of README.md
From this, we can see that the commits went from initial, to adding missing data, and then fixing the info leak (the last being the version we cloned). Let’s checkout the commit that had the ‘missing data’, then read the README.md file again:
bandit28@bandit:/tmp/ahessmat_bandit28/repo$ git checkout 186a1038cc54d1358d42d468cdc8e3cc28a93fcb
Previous HEAD position was 073c27c... fix info leak
HEAD is now at 186a103... add missing data
bandit28@bandit:/tmp/ahessmat_bandit28/repo$ cat README.md
# Bandit Notes
Some notes for level29 of bandit.

## credentials

- username: bandit29
- password: bbc96594b4e001778eee9975372716b2
We’ve discovered the way to connect to the next level is:
ssh bandit29@bandit.labs.overthewire.org -p 2220
bbc96594b4e001778eee9975372716b2
Bandit Level 29 → Level 30
Level Goal
There is a git repository at ssh://bandit29-git@localhost/home/bandit29-git/repo. The password for the user bandit29-git is the same as for the user bandit29.
Clone the repository and find the password for the next level. Commands you may need to solve this level
git
We continue to foster our skills and understanding in git with this challenge. Whereas in the previous two challenges, we learned how to clone a repo and then review commits to a repo, in this challenge we’re introduced to branches. Git branches provide a means for users to create a temporary space to work/develop a feature to the repo with an intention of merging them into the primary (or “master”) branch later.
Let’s begin this challenge the same way we did in “Bandit Level 27 → Level 28” by creating a temporary working directory, cloning the repo, and examining what’s given:
bandit29@bandit:~$ mkdir /tmp/ahessmat_bandit29
bandit29@bandit:~$ cd /tmp/ahessmat_bandit29
bandit29@bandit:/tmp/ahessmat_bandit29$ git clone ssh://bandit29-git@localhost/home/bandit29-git/repo
Cloning into 'repo'...
Could not create directory '/home/bandit29/.ssh'.
The authenticity of host 'localhost (127.0.0.1)' can't be established.
ECDSA key fingerprint is SHA256:98UL0ZWr85496EtCRkKlo20X3OPnyPSB5tB5RPbhczc.
Are you sure you want to continue connecting (yes/no)? bbc96594b4e001778eee9975372716b2
Please type 'yes' or 'no': yes
Failed to add the host to the list of known hosts (/home/bandit29/.ssh/known_hosts).
This is a OverTheWire game server. More information on http://www.overthewire.org/wargames

bandit29-git@localhost's password:
remote: Counting objects: 16, done.
remote: Compressing objects: 100% (11/11), done.
remote: Total 16 (delta 2), reused 0 (delta 0)
Receiving objects: 100% (16/16), done.
Resolving deltas: 100% (2/2), done.
bandit29@bandit:/tmp/ahessmat_bandit29$ cd repo
bandit29@bandit:/tmp/ahessmat_bandit29/repo$ ls
README.md
bandit29@bandit:/tmp/ahessmat_bandit29/repo$ cat README.md
# Bandit Notes
Some notes for bandit30 of bandit.

## credentials

- username: bandit30
- password: <no passwords in production!>
We could check the git logs, but there isn’t anything interesting to see. Besides, as I alluded to earlier, we want to check out Git’s branch functionality. So let’s begin first by seeing what branch our repo is associated with and then view all other branches that exist:
bandit29@bandit:/tmp/ahessmat_bandit29/repo$ git branch
* master
bandit29@bandit:/tmp/ahessmat_bandit29/repo$ git show-branch -a
* [master] fix username
 ! [origin/HEAD] fix username
  ! [origin/dev] add data needed for development
   ! [origin/master] fix username
    ! [origin/sploits-dev] add some silly exploit, just for shit and giggles
-----
    + [origin/sploits-dev] add some silly exploit, just for shit and giggles
  +   [origin/dev] add data needed for development
  +   [origin/dev^] add gif2ascii
*++++ [master] fix username
We can see that there are 2 branches currently stemming off of our master branch: - origin/dev - origin/sploits-dev
Using git, our branch can be changed from master to one of these other existing branches and then seeing what exists in those branches.
bandit29@bandit:/tmp/ahessmat_bandit29/repo$ git checkout origin/dev
Previous HEAD position was 2af54c5... add some silly exploit, just for shit and giggles
HEAD is now at 33ce2e9... add data needed for development
bandit29@bandit:/tmp/ahessmat_bandit29/repo$ ls
code  README.md
bandit29@bandit:/tmp/ahessmat_bandit29/repo$ cat README.md
# Bandit Notes
Some notes for bandit30 of bandit.

## credentials

- username: bandit30
- password: 5b90576bedb2cc04c86a9e924ce42faf
We’ve discovered the way to connect to the next level is:
ssh bandit30@bandit.labs.overthewire.org -p 2220
5b90576bedb2cc04c86a9e924ce42faf